How I restored a Sony Vaio PCG C1XD without a Sony CDROM drive
Disclaimer: this was totally unofficial and not recommended by Sony or even me. If this laptop was still under warranty, that warranty would be considered violated (As you will probably be, if the lawyers catch you even googling this!)
The official technique seems to involve buying an Sony brand, external CDROM reader that's more expensive than better third party models, but is mandatory since no other brand or model will work. *cough* Lockin!
Normal 3rd party USB CD drives aren't bootable with this laptop, which makes things difficult for the screwdriver deprived..
Just the screwdriver deprived.
My Short Version:
Transfer the hard drive to a normal PC, copy the files from the CD to the D:partition, put the drive back into the laptop and start the restore from the bare bootable C: partition using the command
RESTORER C: D:\SONY.IMG -V
My Longer version (with photos)
Extraction
- I backed up my stuff more than usual
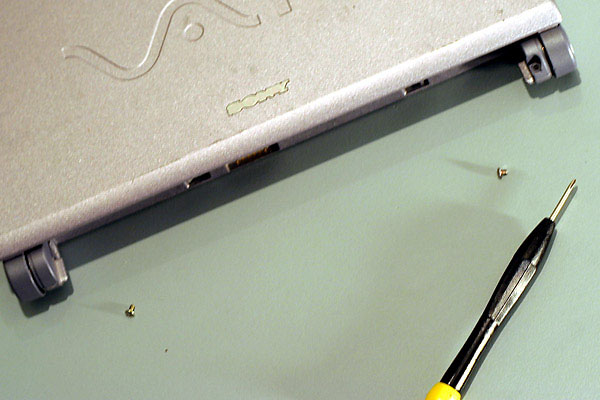
- I turned my laptop onto its front and remove the five screws off the back (the sixth is the RAM cover which is optional)
- I removed the battery, to expose the removable cover caps
so I could remove the two concealed screws

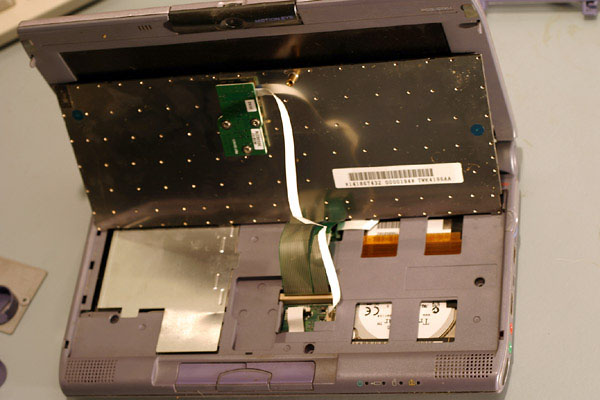
- I rolled my laptop back to normal, and with a flat bladed screwdriver I pushed the hidden catches under the bottom row of keys, approximately under the FN and PGDN keys, so the keyboard popped up
- I disconnected the two keyboard cables
The friction catches are straight forward, lift them a millimetre or two (tweezers worked for me) and the cable just slides out from inside, leaving the catch still attached to the board. The keyboard can then be pulled straight out. - The middle panel needs those two cables

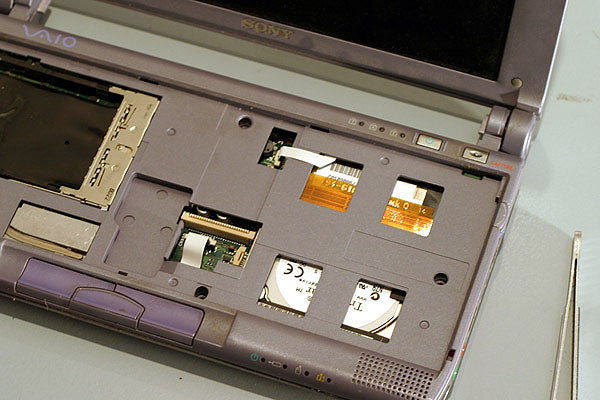
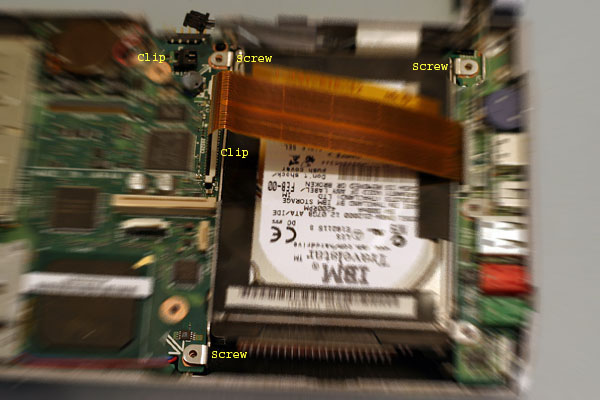
disconnected before it lifts out too - To get the hard drive out
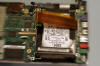
I disconnected the remaining two cables and then the three screws holding it down (bottom right was missing on my laptop)
Loading
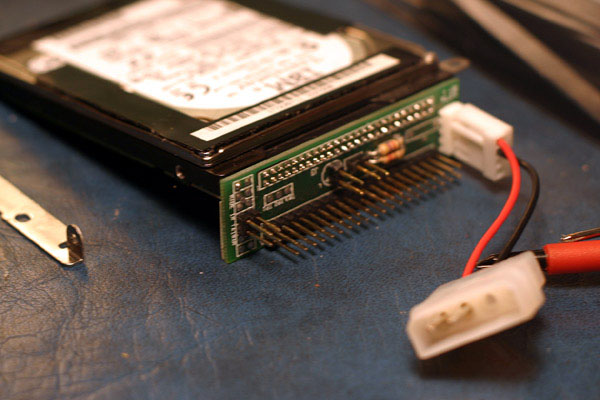
- Using an IDE converter

borrowed from Ross at Softlink NZ (thanks) I was now able to make my VAIO laptop drive appear as an IDE drive.. - Turning off the PC
I plugged the VAIO HDD into the secondary IDE cable and the power
I left the existing PC drive on the primary IDE since I needed it for windows
I connected in my external USB DVD writer to use as a CD reader - Starting the PC, Windows detected it fine, and I was able to do a full backup
- I discovered (the hard way) the Sony restore wouldn't run on the PC, even when booting from CD, due to being a hardware specific install.
- But using windows, I created two partitions (C: and D:).
(XP command START DISKMGT.MSC ) - I booted off a win98 floppy disk and formatted Drive C as bootable FAT, using the MS-DOS command
FORMAT C: /S - D: got ordinary FAT, using
FORMAT D: - Drive D: had the restore CD1 and a Network card driver copied into it
Restoring
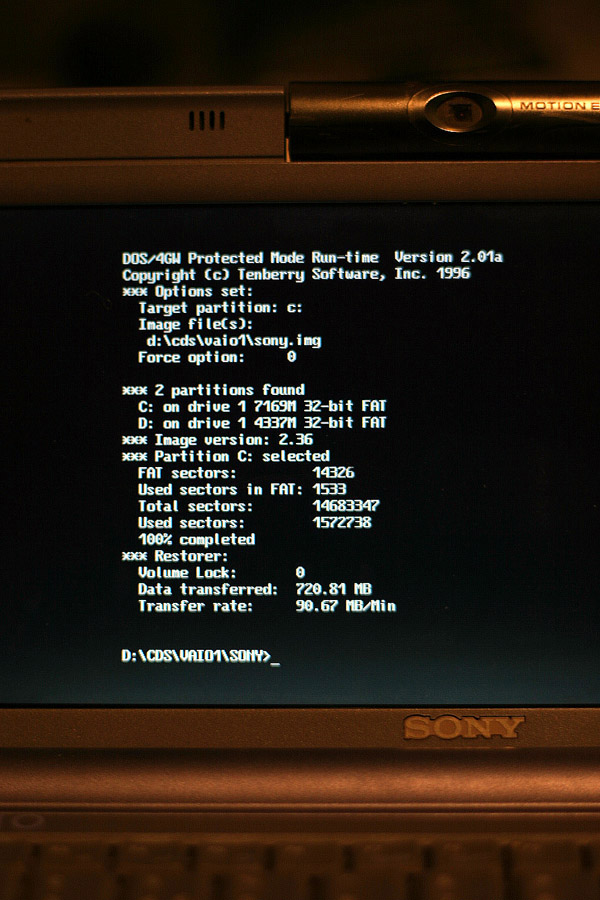
- Returning the hard drive to the Vaio I was able to boot onto the C drive
- Using the dos commands
D:
CD \cds\vaio1\sony\
RESTORER c: d:\cds\vaio1\sony.img -v I was able to get inside the restorer directory and restore the Sony image over the C drive

- One reboot later and I was experiencing cutting edge 1998 software.
- Once the NIC drivers were installed, I was able to pull other software off the network CD drives.
©Chris 21/6/2004 (last updated 18/04/2007)